Previous Page

Linux Hypervisor Setup (QEMU/KVM virtualisation)
In this tutorial we're going to cover how to setup the open source hypervisor QEMU/KVM in Linux host OS, using the libvirt technology.
In this tutorial we're going to cover how to setup the open source hypervisor QEMU/KVM in Linux host OS, using the libvirt technology.
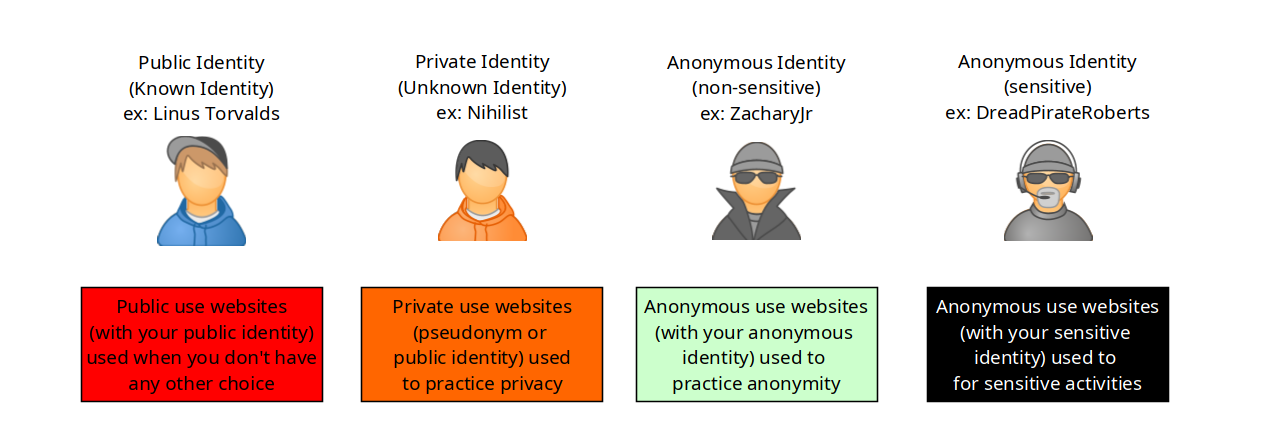
Bob has a problem, he wants to use his laptop for 4 different internet uses:
But currently, he has only one laptop with linux as the host OS.
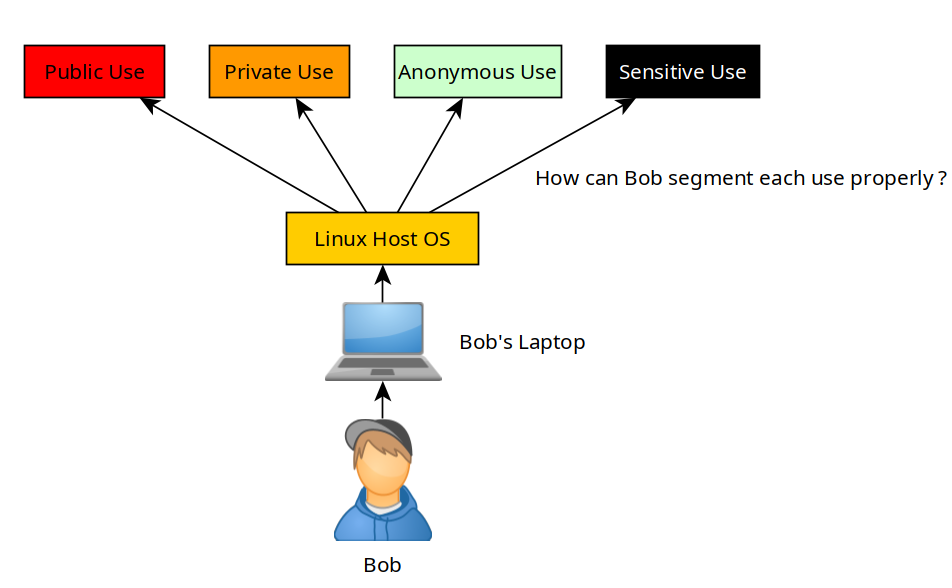
So the idea basically is that Bob does not need to purchase 4 laptops each for a different usage, he just needs to virtualise those machines using a Hypervisor:
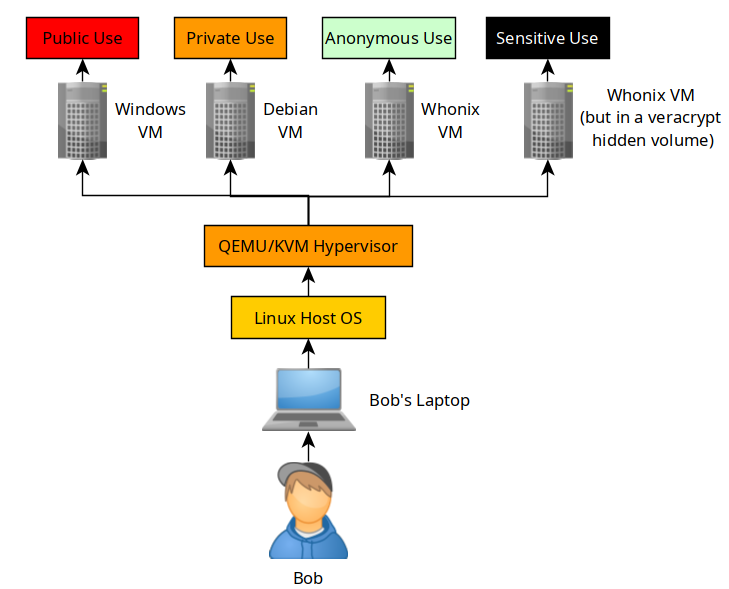
Bob is going to use a QEMU/KVM hypervisor to virtualize 4 VMs, each for a specific use. The windows VM will be for public use, the debian VM will be for the private use, the Whonix VM will be for Anonymous use, and the other whonix VMs in the veracrypt hidden volume be used for sensitive uses.
Next we do not virtualize anything using closed-source software like VMWare Workstation or else. We use QEMU/KVM with virt-manager, which is an open source hypervisor:
nihilist@debian:~# sudo apt install libvirt0 virt-manager dnsmasq bridge-utils
sudo systemctl enable --now libvirtd
nihilist@debian:~# sudo usermod -a -G libvirt nihilist
nihilist@debian:~# sudo usermod -a -G kvm nihilist
nihilist@debian:~# sudo vim /etc/libvirt/libvirtd.conf
nihilist@debian:~# cat /etc/libvirt/libvirtd.conf | grep sock_group
unix_sock_group = "libvirt"
unix_sock_rw_perms = "0770"
nihilist@debian:~# sudo chmod 770 -R VMs
nihilist@debian:~# sudo chown nihilist:libvirt -R VMs
nihilist@debian:~# cat /etc/libvirt/qemu.conf
group = "libvirt"
user = "nihilist"
nihilist@debian:~# systemctl restart libvirtd.service
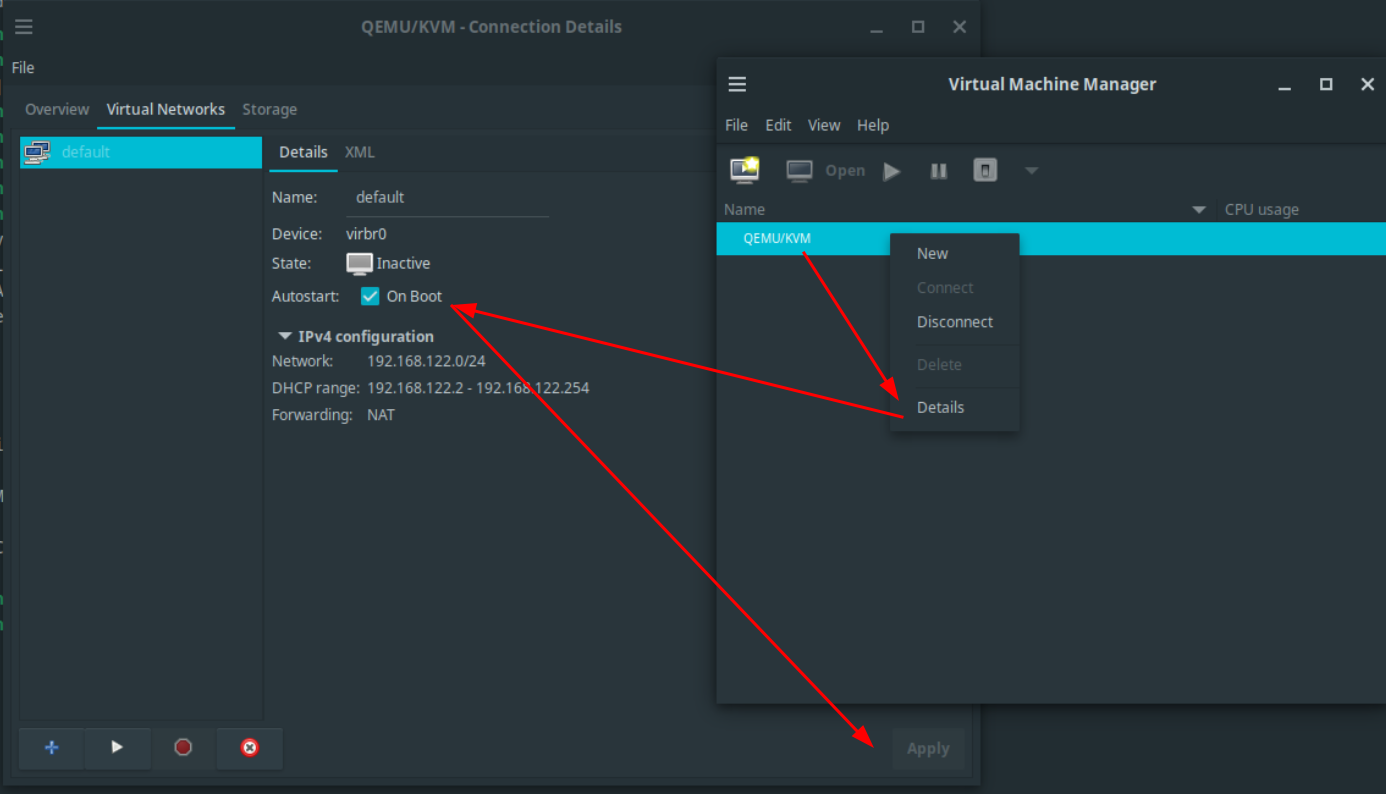
virt-manager
Next just make sure that the NAT network is created, and that the ISOs and VMs folders are with the correct permissions:
nihilist@debian:~$ mkdir ISOs
nihilist@debian:~$ mkdir VMs

nihilist@debian:~$ sudo chmod 770 -R VMs
nihilist@debian:~$ sudo chmod 770 -R ISOs

nihilist@debian:~$ sudo chown nihilist:libvirt -R VMs
nihilist@debian:~$ sudo chown nihilist:libvirt -R ISOs
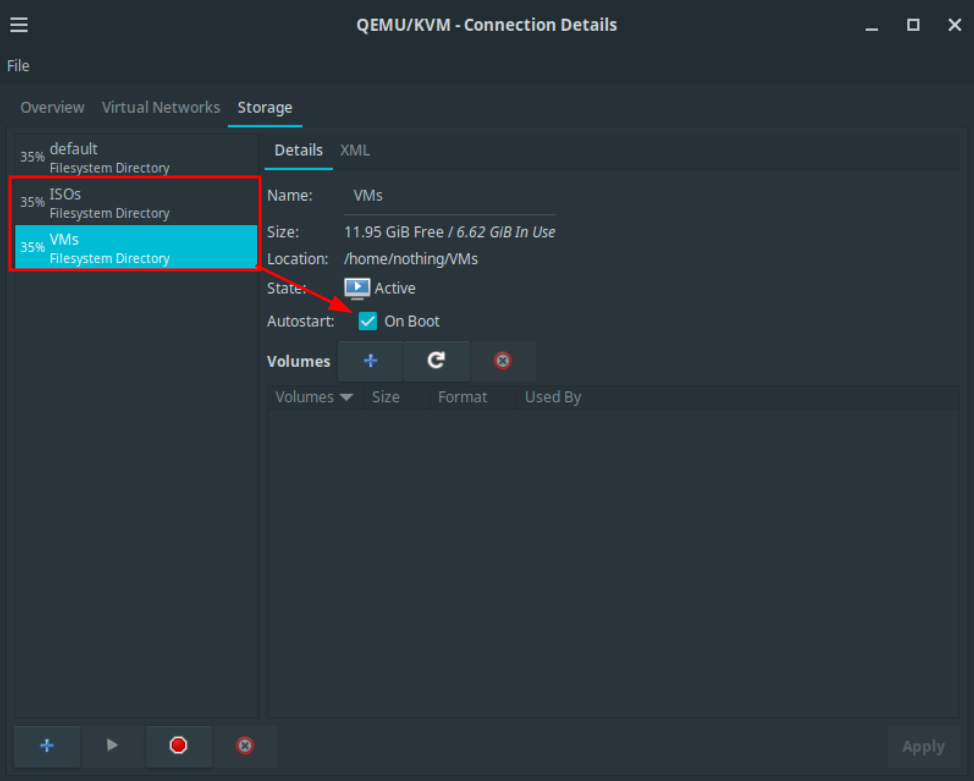
Then you can add the file directories in virt-manager like so:
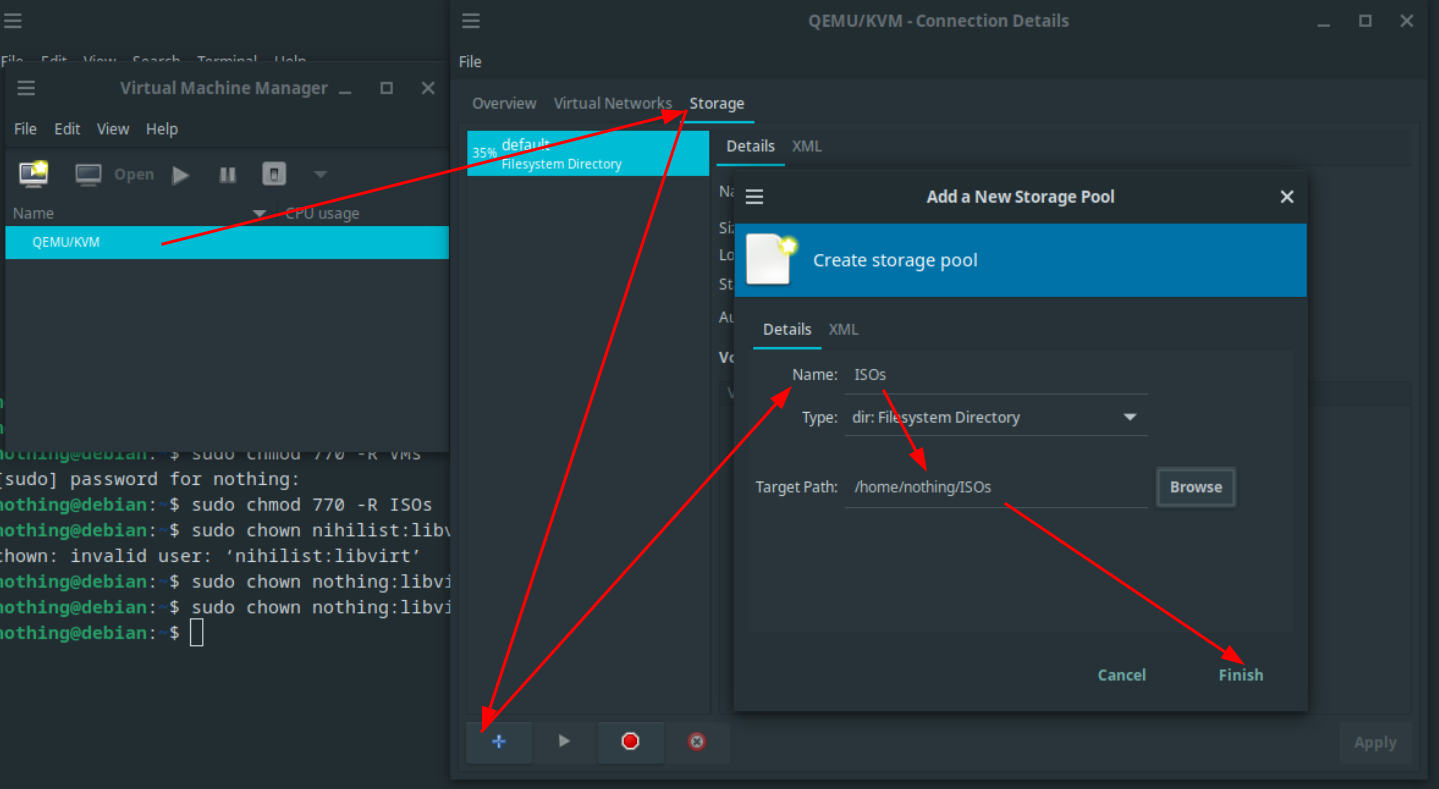
And now you're all set to start making VMs while maintaining the open-source requirement. If you still want to use a closed-source OS, you can do so in a QEMU VM from virt-manager. always remember that closed-source OSes like Windows belong in a VM, never out of one.
Additional notes: you can prevent an adversary to tamper with your laptop, by using glitter polish as shown in mullvad's tutorial, and also make sure that your phone does not have a closed-source host OS by using Graphene OS.
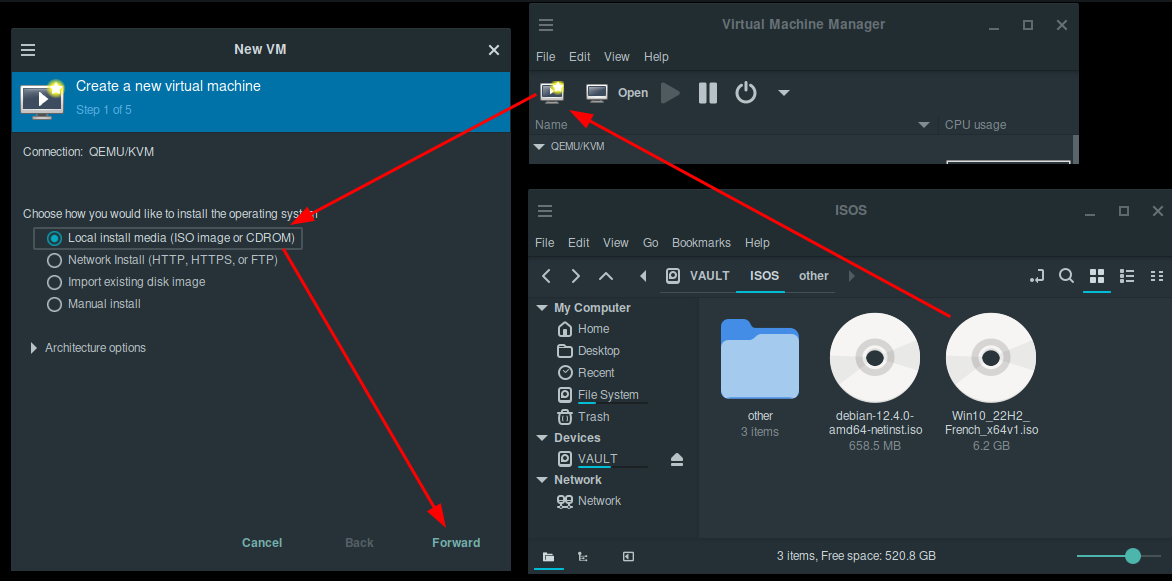
Next, Bob needs to use VMs for 2 basic needs: Public internet usage, and Private internet usage. He first needs to download the Windows ISO file, and the debian iso file too:
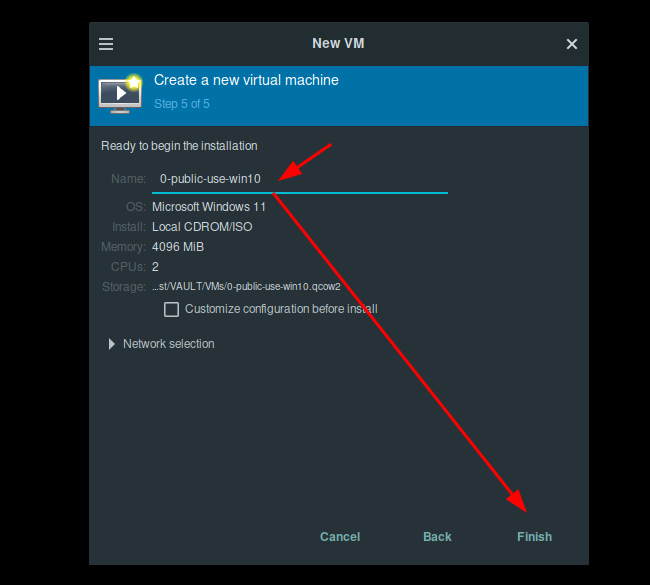
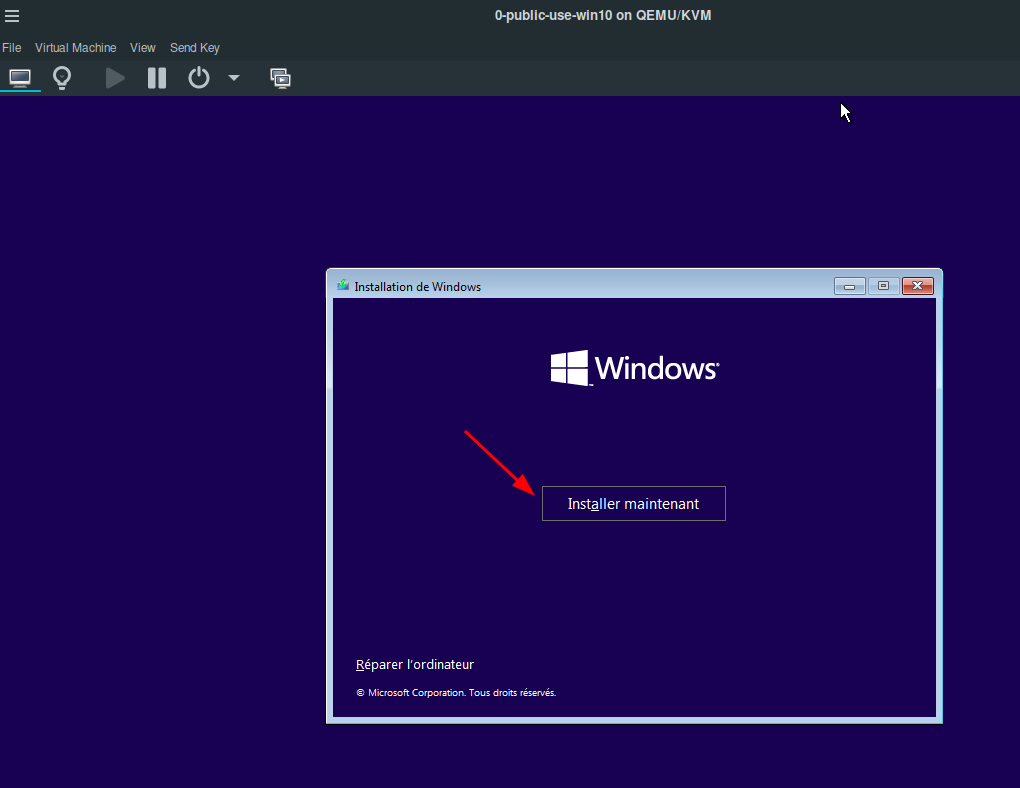
First he creates the windows VM like so:
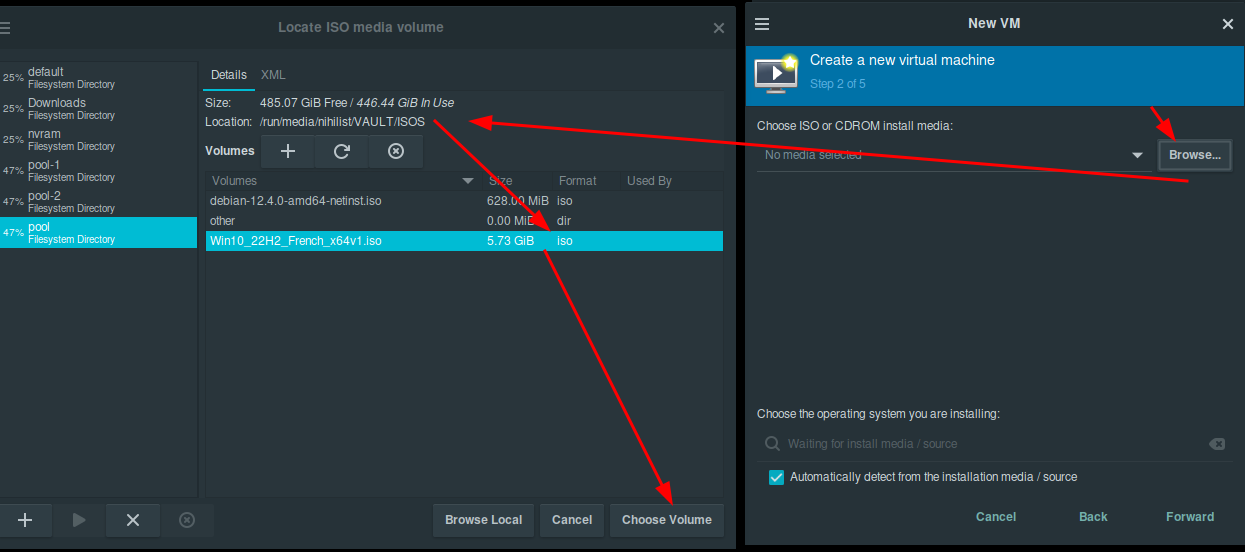
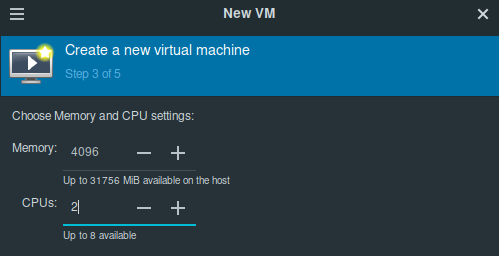
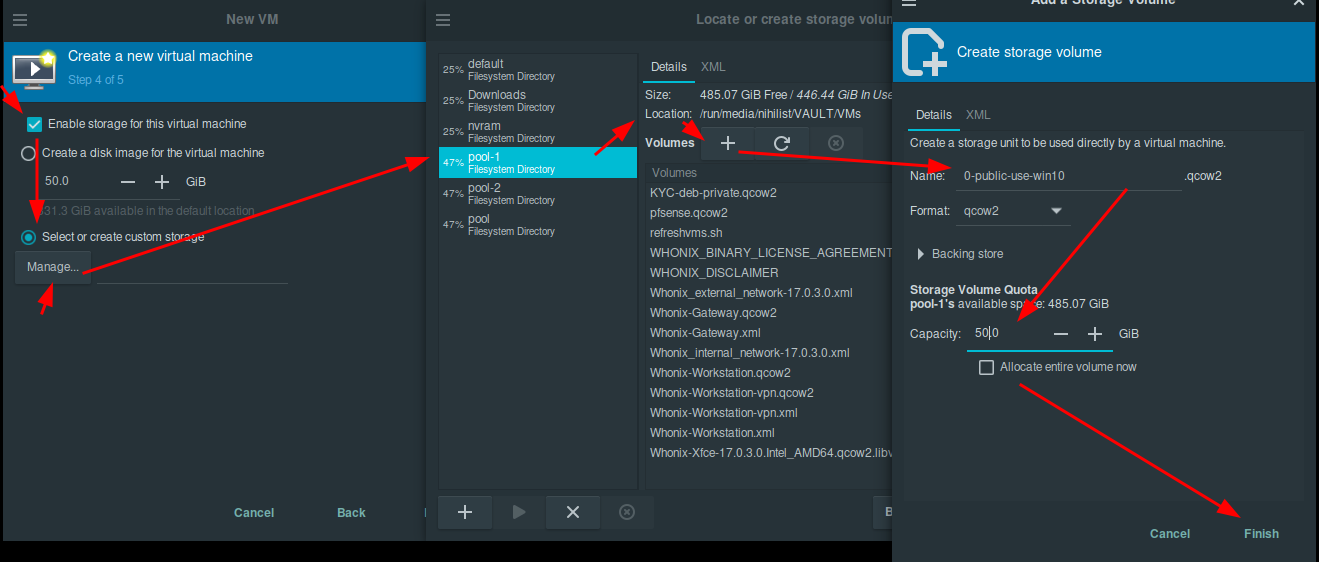


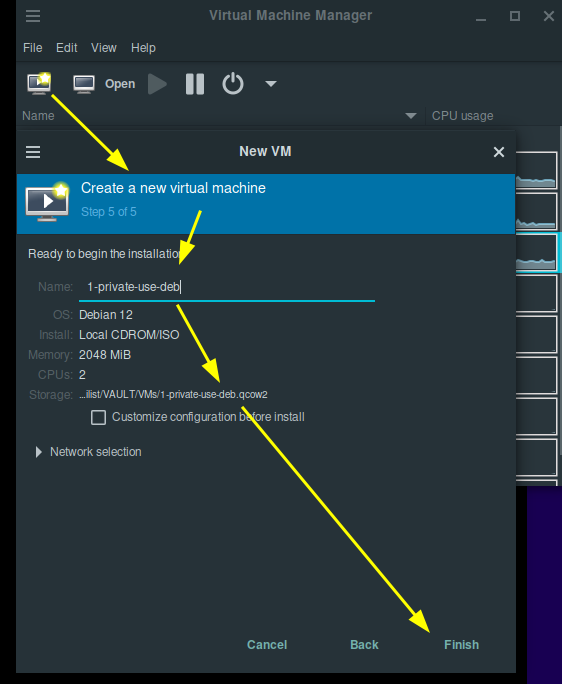
Then he creates the debian VM like so:
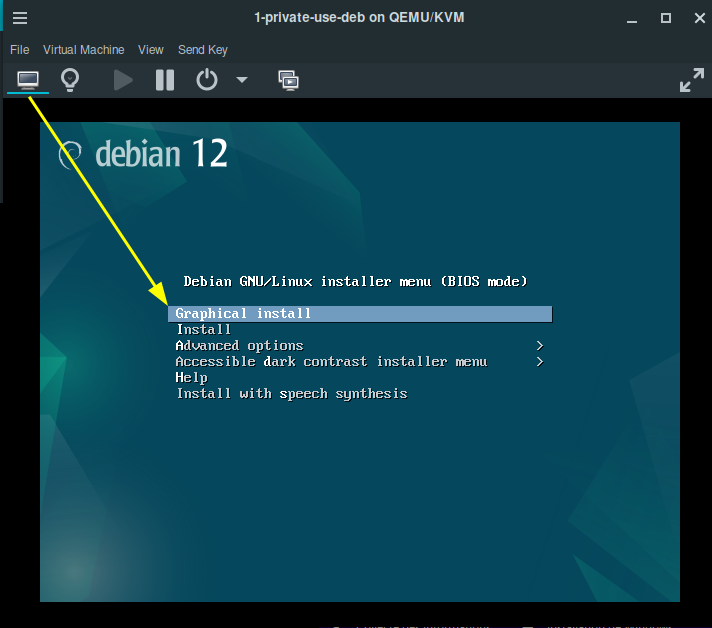
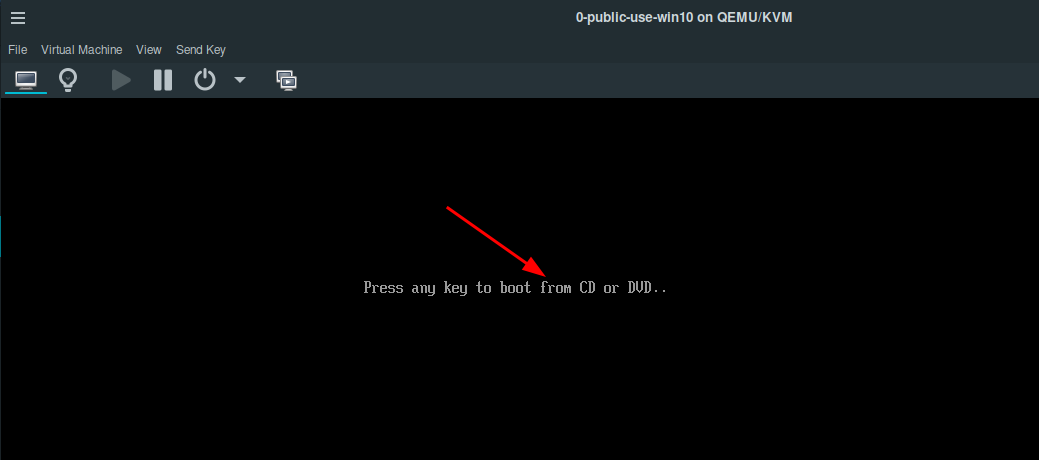
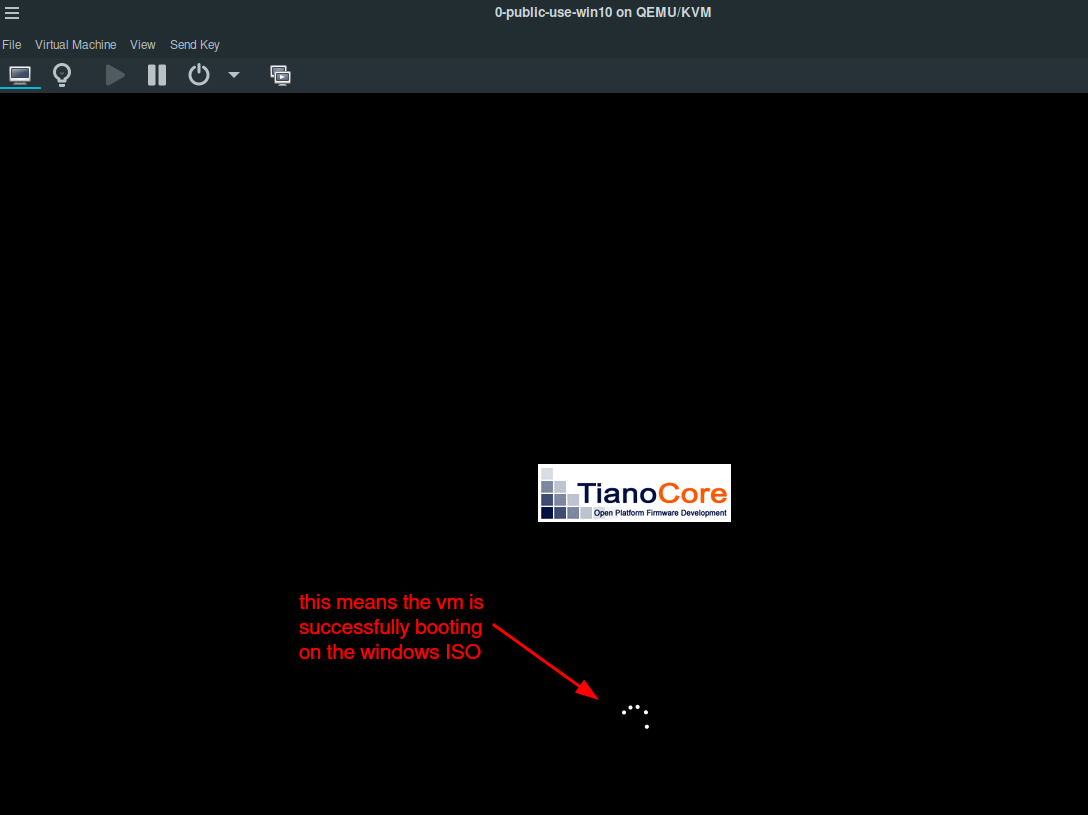
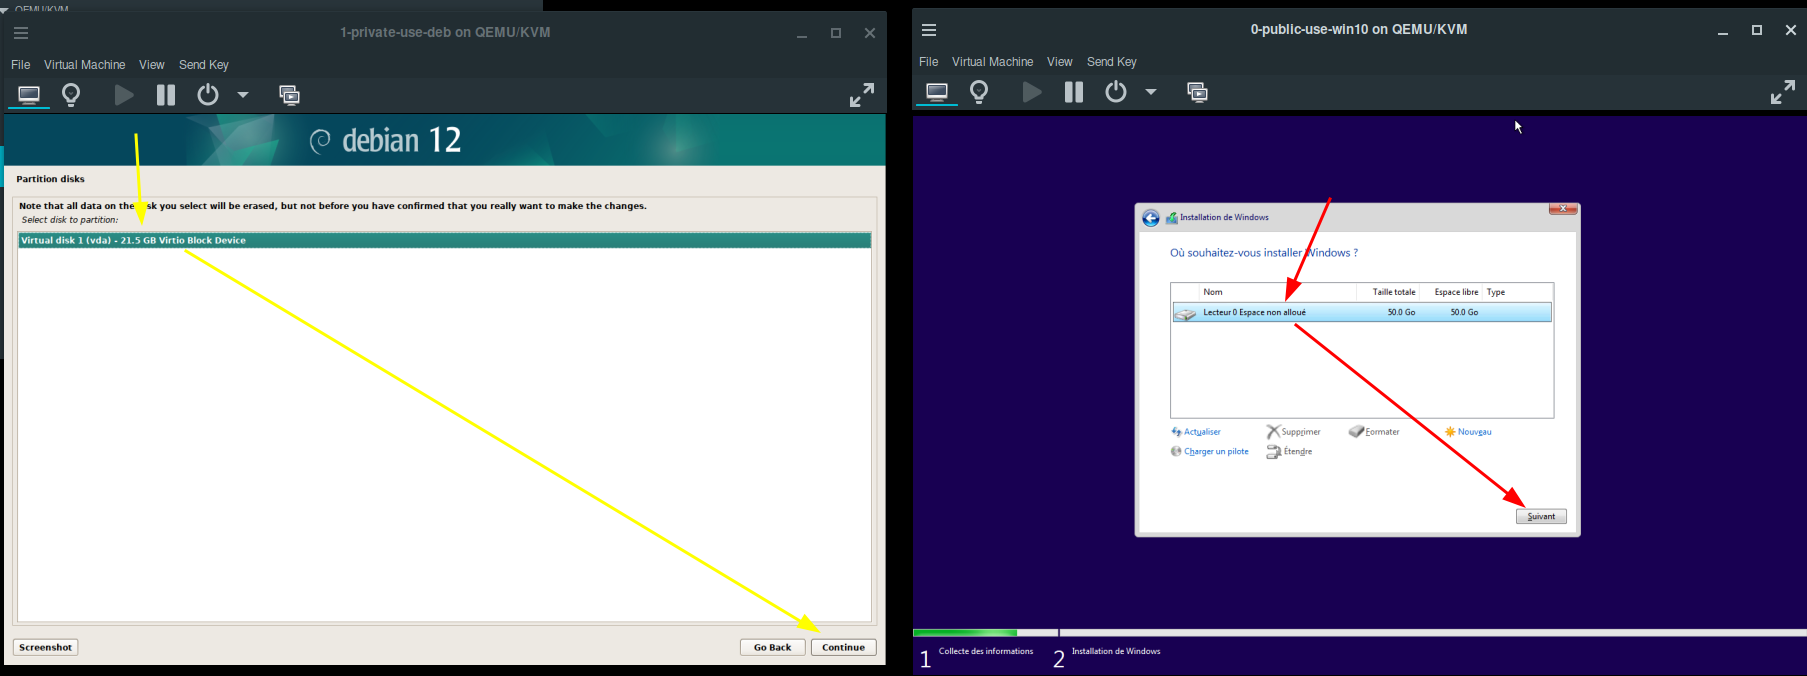
Then in both VMs he installs the OS on the virtual disk:

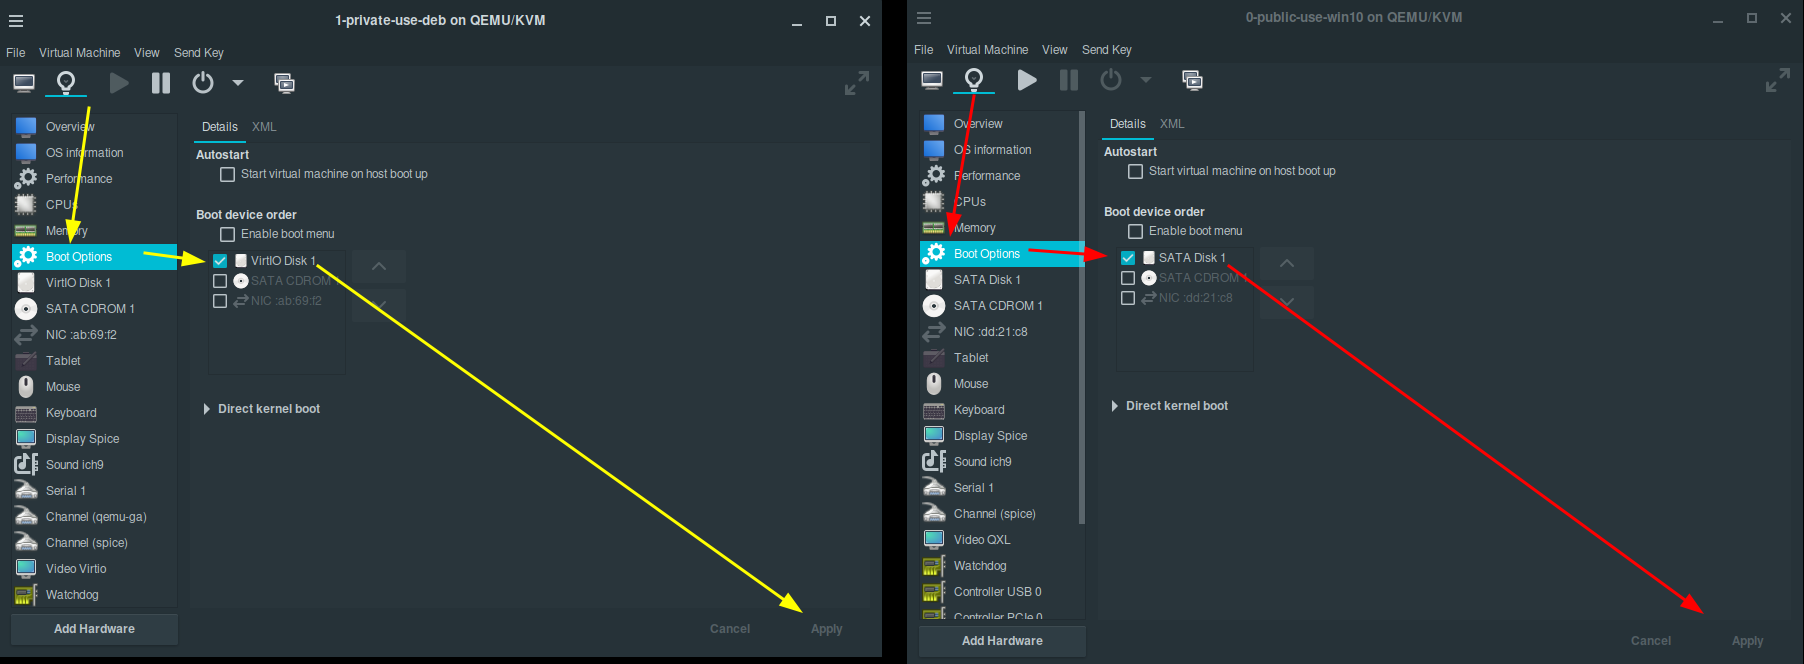
Then Bob can launch both VMs (make sure that the VM boots onto the disk instead of the iso in the boot settings):
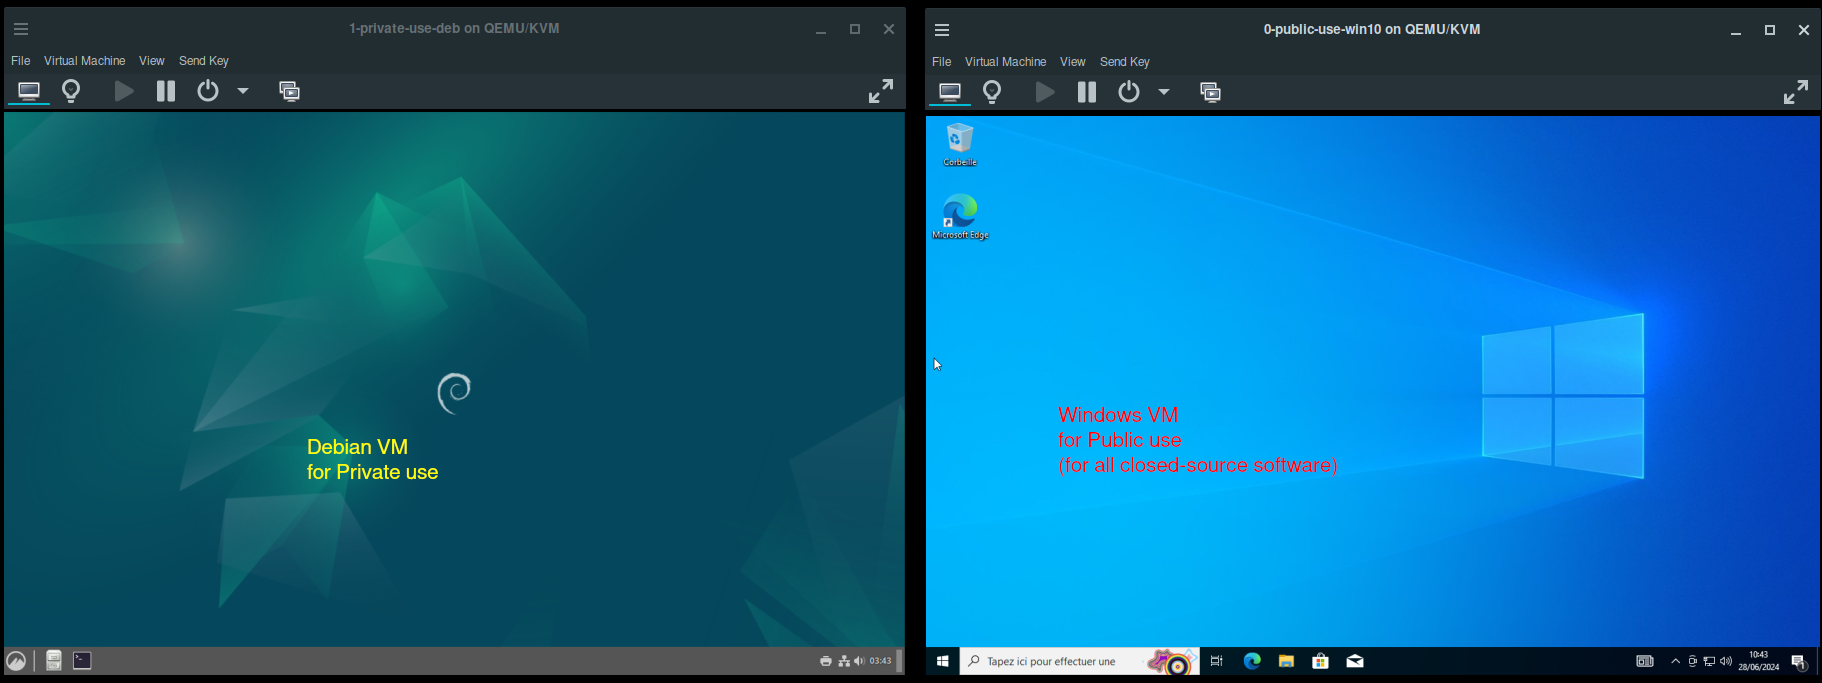
Then Bob can use the windows VM for his public usage (such as KYC services, and closed-source software), and use the debian VM for his private usage (any personal matter, with only open source software)
Next, Bob can setup a VPN by default into his debian VM.
Until there is nothing left.
Donate XMR: 8AUYjhQeG3D5aodJDtqG499N5jXXM71gYKD8LgSsFB9BUV1o7muLv3DXHoydRTK4SZaaUBq4EAUqpZHLrX2VZLH71Jrd9k8
Contact: nihilist@nihilism.network (PGP)